Showing posts with label books. Show all posts

Friday, October 6, 2017

San Francisco Book Arts


The Book Arts Jam, organized by the Bay Area Book Artists in San Francisco is so much fun. Every year, it is a one-day celebration of the book, print & paper arts, now held at the Elks Lodge in Palo Alto each October - this year on the 15th. Click here for more information.

Polymer clay covers, imprinted with my carved dragonfly
Paste paper accordion: Italic calligraphy

During the Exhibition of Artist Books I bought these fun books, Book Artist Blues, an open edition, and The Tourist, mine is #20 out of a limited edition of 30, from Nikki Thompson of Deconstructed Artichoke Press. 


Green Chair Press was there, I loved this handmade spiral bound book, A Reader’s Diary. Comes with a pretty bookmark to remind the reader on rating the book. Lovely idea and I had to have it!


At the Exhibitor Hall I bought this lovely print that hangs in my kitchen.
I saw this wonderful handmade bone folder from Don Drake, owner of Dreaming Mind Bindery and had to have it. Once a year Don sells his handmade bone folders at local book art events and I was lucky to see it early in the day. By the end of the day he sold out.


My husband Kevin enjoyed talking with Ingrid Butler of Moth Marblers. Kevin knows how to marble paper and fabric. Kevin bought this lovely silk necktie. For more info on Ingrid, go here.

They had 50 vendors and I spent all day visiting and learning with mini-workshops, from 11 am to 5 pm. It was a heavenly day!


And no visit to San Francisco is complete without a visit to the City Lights Book Store where I actually met Lawrence Ferlinghetti - an unforgettable experience. Do you recommend any book arts events?


©Anne Rita Taylor 2017

Friday, September 15, 2017

Halloween Books


Even though Halloween is a month away, it’s fun to show books I made recently. I also have suggestions on how to use them.


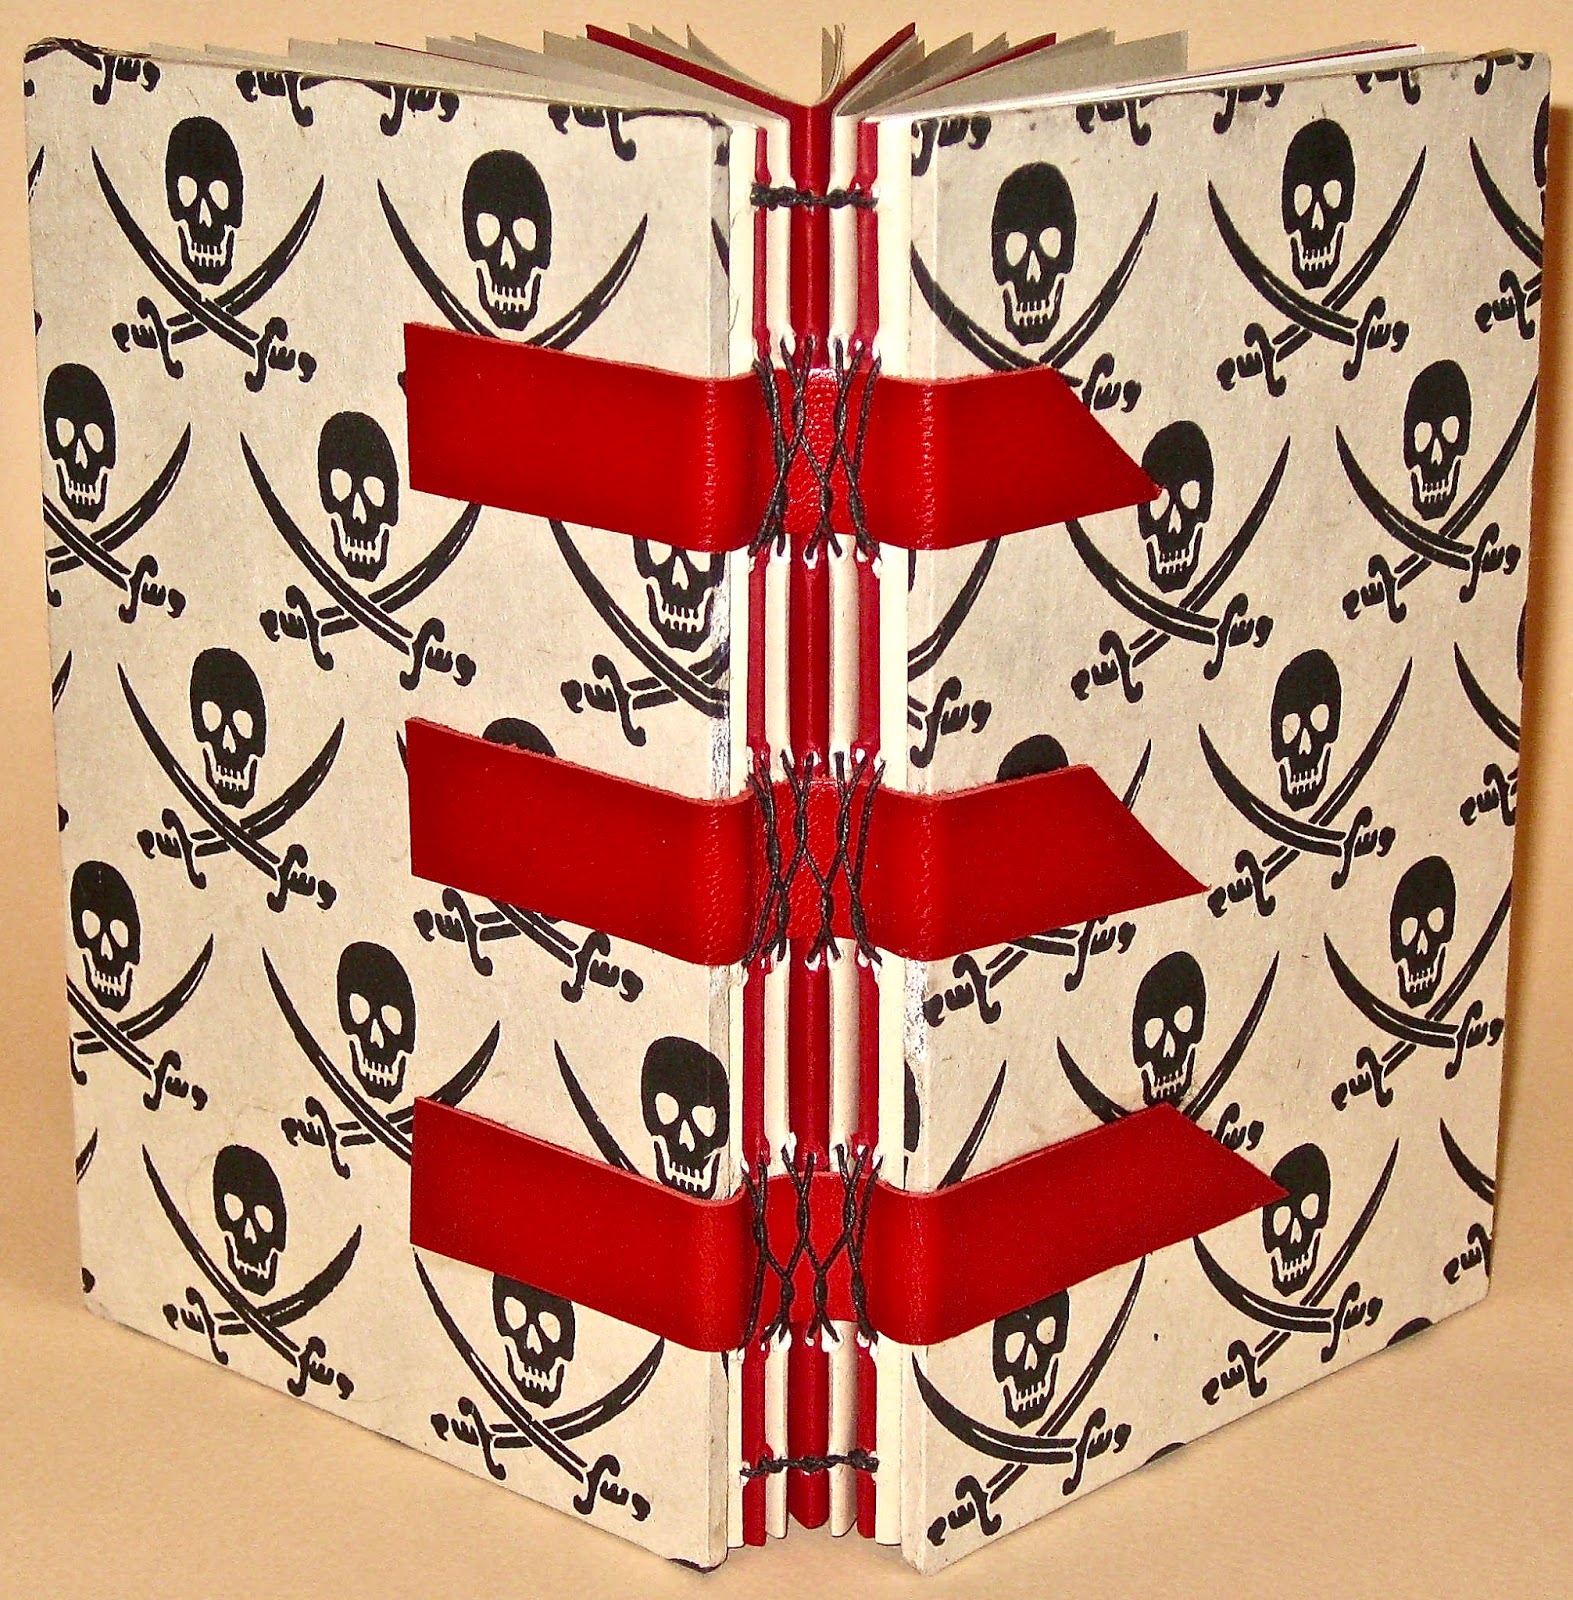
My friend, Liz Constable of Book Art Studios in New Zealand, used skull paper for her book covers. She inspired me to make books with two prints of skull paper I had in my paper stash.


This book is an ode to Liz, who taught me a form of Coptic binding last year when I won her Facebook contest. See my blog about winning - here. Liz will give online classes soon and she is a fabulous teacher, very patient!


The other book I bound with a French Link Stitch to fit into a box. Art Supply on Main in Houston (where I taught last July 2016) sells box kits, the box below I made with their kit.


Important to keep in mind the needle catches under the thread closest to the next hole (or station) to make the French Link. Also be sure to use a Kettle stitch at the top and bottom so your book covers will not wobble.


I came up with these uses for a Halloween book:

1. Visitor book for Trick or Treaters using their costumed character name, such as Wonder Woman, Batman, etc.

2. Halloween party guest book using visitor names and scary comments about horror movies they love!

3. Personalize: write their names on book covers for family and friends.


When would you use a Halloween Book!?! 

Boo!


©Anne Rita Taylor 2017

Friday, May 20, 2016

Bookbinding in Los Angeles

©Anne Rita Taylor 2016

I like to take a class when I travel. I found Charlene Matthews Bindery in Hollywood when I visited Los Angeles during Halloween 2010. We emailed to come up with a day when she had a workshop. Turned out I was the only student!


Charlene’s bindery is a storefront on Melrose Avenue where you can see the famous Hollywood sign. Charlene has bound books for movies such as Indiana Jones. We had a whole day - including lunch - of bookbinding. I was in heaven! 


Charlene showed me around her fabulous shop and asked me what I’d like to learn. Even though I was bookbinding for a while I look for alternatives to use. Charlene let me know she was using something new: a fine mesh screen-like material for pages and covers. 


Charlene demonstrated, covering the fine mesh with paper; we each made covers. We made the spine pieces, figuring out which paper to wrap around them; we hole-punched the signatures using lovely watercolor paper, and sewed the text block through the mesh onto the spine.


Since I made two spine pieces Charlene suggested I make another book with a leather wrap-around cover. I learned that the thread does not need to go through every station (hole) that was punched. It was a revelation to me!


I love these variations of the Tightback Longstitch Bindings taught by Charlene. I had not used spine pieces before and the books open flat for art journaling.


Charlene sent me home with some of that fine mesh material which I’ve since found at Ace Hardware. Recently I bought a whole roll of it and I'll use it too.  

Friday, April 22, 2016

David Jones Lettering

©Anne Rita Taylor 2016

By Anne Rita Taylor
I won a Scholarship in 2012 from the Houston Calligraphy Guild. I knew I had to do a meeting presentation at HCG within the year which is a requirement of winning.

By David Jones
While I was working full time I found an online class from an Australian Calligrapher, Gemma Black, on David Jones Lettering, which I had never attempted. David Jones (1895-1974) a poet and calligrapher from England, wrote a page of calligraphy as if he were painting a picture.

By David Jones
David Jones combined Latin, Greek and English. “Exit Edictum" comes from the account of Christ’s birth in St. Luke’s Gospel. Along the left side: “I am Redit Apollo” comes from Virgil’s Fourth Eclogue (selection). Jones preferred colored backgrounds and lettering in colors.


Gemma’s workshop consisted of three lessons, the first two had four exercises each. My letters were written with colored pencils and nibs. Annotating what I wrote with and wrote on was a new experience for me to record what worked and what did not.


We emailed back and forth. Gemma gave me good suggestions on my first attempts and I had hope that I could improve with more practice. Writing on a ground of white acrylic paint was a fun learning experience!


For my Houston Calligraphy Guild presentation I penned my own Exemplar (A to Z) of David Jones Letters. I did not present any of Gemma’s calligraphy since attendees were taking photos and I wanted to preserve Gemma’s copyright protection.


My calligraphy on the cover of the 8 page books I made for each person at the Houston Calligraphy Guild presentation on May 2013. It was a full house with about 60 people attending!


A more recent alphabet I wrote in my journal.


I highly recommend Gemma Black’s teaching! I was lucky to meet her in person when she taught at the Legacies Calligraphy Conference in Dallas during July 2014. We had a lovely time at The Marriott Renaissance Hotel.

Please leave a Comment if you liked learning about David Jones Lettering!


Friday, April 1, 2016

Edible Book Day

©Anne Rita Taylor 2016


April 1st is Edible Book Day, celebrated since 2000, with the Books 2 Eat Festival in Houston and globally too. Tonight festivities held at 7:00 pm at The Printing Museum. For this event I created my "A is for Apples" book using a French Link Binding.


Here are some of the steps I took sewing the French Link Stitch. I begin by making sewing stations (holes) inside my sewing cradle using a needle awl. 


Glossy white paper cut 7 3/4 by 4 3/4 inches to fold six pages together to form a signature. Six signatures for a total of 144 pages in the text block. A page in front and back are glued with apple end papers to each cover.


I wanted to have a ribbon to tie to an apple, but also tie a bow after the apple is eaten. So besides having the ribbon I also have the two hinges to prevent the book from going wobbly.


I sewed two kettle stitch areas at the head and the tail. Even though I started sewing from the outside, at the last sewing station (hole) I thread a needle, make a kettle stitch, then bring the thread inside to knot and tie off. 


I placed the book in my Arnold Grummer Paper Press for a few hours before I glued the apple end papers to the front of the text block & front cover, and repeat for the back cover. 


The French Link stitch is a pretty binding with an open spine where you can see the stitches.


I'm happy with how it came out! Thanks go to Lee Steiner, current President of the Houston Book Arts Guild who suggested using a basket and the title, A is for Apples, too!