Friday, July 29, 2016

Window Accordion Book

©Anne Rita Taylor 2016
I wanted to combine handmade paper with a Zig Zag book plus my carved images to make a gift for a friend going through health issues. I wrote some encouraging words alongside the printed images for her.
Supplies:
Handmade paper - 5 pieces:
1 x 7 inches, (2) 4 x 5 inches, (2) 2 1/2 x 6 inches
Arnold Grummer Mini Zig Zag Books
PVA or Mod Podge glue
Bonefolder, scissors, ruler
Carved images or rubber stamps
The Zig Zag book has 6 sides, begin by cutting slits on the 2nd and third side, then the 4th and 5th side, cut into one and 1/8th inches, leaving a half inch on the top and bottom, as pictured:

Fold in where you made the cuts to form your window, as pictured:

Paint the Zig Zag inside the covers and top and bottom with Tim Holtz Distress Stain: Peeled Paint. Adhere both 4 x 5 inch paper pieces to each cover.
Glue two pieces of 2 1/2 inch by 6 inches handmade paper together forming a long strip 2 1/2 by 11 1/2 inch piece. Print your rubber stamps in front of the openings, the windows. Glue 1 1/2 inches of each end inside the covers, and fold with the book.
Lastly, to make the band, fold around your closed book the 1 x 7 inch handmade paper and glue the overlapping half inch, not too tight because you want it to slide off.
Your gift is ready to write your heartfelt wishes inside for your recipient to enjoy!

Friday, July 22, 2016

My Bookbinding Workshop

©Anne Rita Taylor 2016
I went to a Golden Paint demo at Art Supply on Main in Houston earlier this year. When Vikki, the co-owner, found out about my blog, she asked me to teach a book workshop; during May we set a date for the workshop: Saturday, July 16th.
My favorite binding is the French Link Stitch. I made a sample book, composed my own instructions, took a few photos and sent the draft flyer to a couple of friends for their advice. 


E.J. said cost stand alone from supply fee; the total was listed. Debbie gave me paper from India; no charge to my students. I added paper choices to my flyer.

I handed out 30 flyers at the Houston Calligraphy Guild Summer Study meeting. Also sent my flyer to The Lone Star Art Guild added to their weekly emailed newsletter.
Four people registered by the Wednesday before the workshop! I started tearing a few sheets of my Arches Text Wove for my demonstration book, as I wanted to use three sheets divided into eight pieces. Vikki let me know she was out of Arches but had Rives.
Five were registered by Thursday! I used up my own supply of Arches Text Wove, and Vikki supplied Rives BFK Lightweight. Multi-Media art paper suitable for wet media from Hobby Lobby rounded out the text paper. It took ink and watercolor beautifully.

Before the class I cut: paper for the covers, end sheets, inside paper folios showing at the spine; plus I tore the Arches and cut the Multi-Media paper.

The students used eight pieces of each of the three types of paper. And divided them into three folios in eight signatures to have a total of 96 pages (both sides). The students tore two half sheets of the Rives Lightweight into quarters to get into the bookbinding groove.

In the class: we covered the boards and hole-punched the signatures in the morning; sewed the text block in the afternoon. Lastly, we glued the end sheets to add the covers and glued the tapes to the cover.
The five hour class on Saturday went very well especially since four out of five students were first-time bookbinders. Everyone loved their books! It was a lot of fun!

Friday, July 15, 2016

Envelope Accordion Book

©Anne Rita Taylor 2016
I wanted to give some suggestions to my friend who was traveling this summer. My envelope accordion book was fun and most appreciated!
Supplies:
Handmade paper - 2 pieces 4 x 5 inches
Ribbon, 18 inches 
PVA or Mod Podge glue, and Scotch tape
Magazines or calendars

Begin by folding the inside of the four accordion pages in half, so now you have eight sides plus the two covers which are not folded.
Making the envelopes: I used flower pictures from Martha Stewart’s Living magazine. I made my template to fit the 3 1/2 inches accordion page. Before gluing up the bottom and sides, it is 4 1/4 inches tall by 5 inches wide.


After you have four envelopes, place glue on half of the front of each envelope. 


Then glue each envelope to the half accordion page.


Instead of writing my own travel advice, I used four of the cards from the pack of Travel Tips, available on Amazon HERE.


You can take out your favorites, I decided on cards about safety, communicating, sleep, and being wary. Copy them and place them in the envelopes, making sure they fit and could be taken out easily.


Glue your handmade paper pieces to the covers. Before you glue the covers onto the book be sure to tape the middle of your ribbon to the back.


Add your handmade paper covers and you have a pretty Bon Voyage gift!


Friday, July 8, 2016

Rubber Amateur Press Society

©Anne Rita Taylor 2016
The Rubber Amateur Press Society (RAPS) began in 1992; I joined in 2015. An interesting book was written about the group in 1996 called, Rubber Soul, by Sandra Mizumoto Posey. I bought my autographed copy at a rubber stamp conference in Grapevine, Texas in 1998. Available from Amazon, HERE.


The goal is to enjoy sharing our carvings with other carvers. Each person sends the host up to 20 (depends how many are in the group) original prints of our carving, (pay the postage annually) and receive the same number back in the mail. The commitment is to participate for a year. Go HERE to my Jan. 15 post for carving instructions.


I had joined a similar group called RAPLICA, in 1998, and participated for 6 years. Carving images for prints was considered folk art, and was not an art form with a large following in the 1990’s; it has since become more wide-spread.


RAPLICA was a bi-monthly swap. I lovingly came up with 6 carvings a year. RAPS is now a quarterly swap: 4 carvings year. Pages are 8 1/2 by 11 inches. The carving can be any size. Some people use calligraphy, writing a quote, or write about what they are doing; others simply send carvings.


Tim Blackburn was the host when I joined RAPLICA in 1998. He asked for someone to take over hosting at the end of 2000 and I volunteered. How I managed that while I was working 60 hours a week and trained 6 assistants in 4 years, I'll never know.


Twelve were participating before I started hosting in 2001. Then seven dropped out! Luckily I was active in the Carving Consortium online group, so I invited ten and seven accepted. 


I hosted for four years, then ended one Corporate job and started another. Wendy Gault returned to volunteer hosting RAPLICA in 2005; she had started RAPLICA in 1993 to have more than 20 RAPS carvers involved.


I usually combine calligraphy and carving,  sometimes book arts on my pages. It has been an enriching experience and I’m happy to participate again now that I have more time.  


Friday, July 1, 2016

16th Century Binding

©Anne Rita Taylor 2016

Focus on Book Arts is a conference held near Portland, Oregon offering several days of workshops on bookbinding, calligraphy, paper making, media backgrounds and more. 

Held in odd-numbered years, I attended a few years ago and learned how to make this 16th Century Limp Paper Binding. 


Taught by Jana Pullman, who is an award winning fine book artist. Here is her website, Western Slope Bindery. She has a fabulous blog with several DIY: About the Binding.

I left the insides open so I would remember all that we did in one day!


The Limp Binding was commonly used for prayer books and text books in the 16th century.  We sewed blank books in the workshop. Endpapers can be glued over the front and back sewed thongs. 


This type of binding has been called “simple” but with all the leather pieces going through the covers I find it more on the intermediate side of bookbinding.


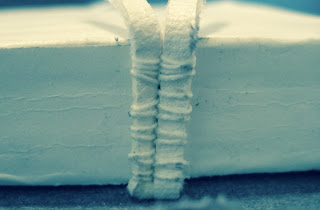
We sewed the text block on double tawed goat leather thongs. This type of sewing begins by going out of the sewing station between the pair of thongs.


When I made one at home I made a packed straight sewing on a single cow leather cord.


I learned how to sew a headband onto leather tongs similar to the sewing supports. I had glued ready-made headbands to the top of books before and this procedure was a revelation!


In the workshop we used handmade paper for the covers; at home I used a thick paper from India I found at Paper Source.


I was happy to learn the Limp Binding and am amazed I learned so much in one day!