Showing posts with label carving. Show all posts

Friday, December 16, 2016

Cards for Christmas

Every December the Houston Calligraphy Guild has members exchange up to three Christmas cards that we can actually send to others. There is a numbering system at the meeting so you never know which cards you’ll receive.
My Xyron machine added adhesive to the back of the green paper. Double-sided tape works too.
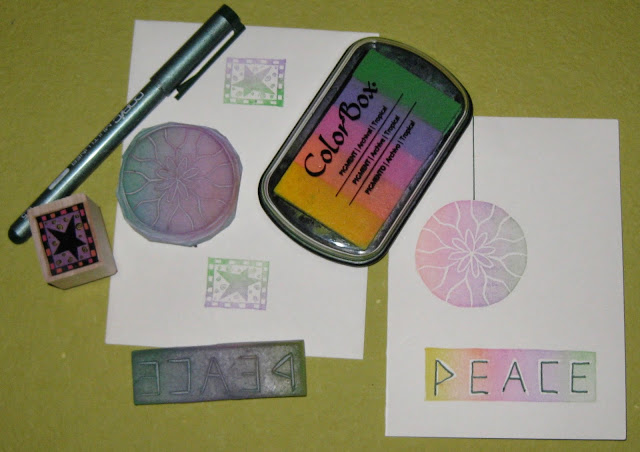
Happy to say - my carved stamps make unique cards. See my carving instructions here: https://anneritataylor.blogspot.com/2016/01/carving-images-for-prints.html - I carved the deer, ornament, PEACE, Merry Christmas, the tree and small circle. The Earth stamp was from All Night Media - out of business from my Google search.
On my visit to Hobby Lobby last week I found Christmas stamps too. Here is the Christmas Ornament card with supplies used.
And I carved a Christmas tree with open circles for tree ornaments and the planet Earth.
Do you send Christmas cards - store-bought or home-made? Are you satisfied with sending a text!?! What Christmas cards, if any, are you sending this year?
©Anne Rita Taylor 2016

Friday, October 14, 2016

Swapping Journal Pages

I had fun carving and journaling recently; it reminded me of my past participation in Art Journal swaps.
Before the current layering craze - to paint backgrounds, drop inks, fill in parts of stencils - we recorded daily personal events in our journals; sometimes adding illustrations.

Mostly I used quotes to practice calligraphy plus printed my carvings or used commercial rubber stamps.
I wrote about my travels in my handmade books. For one of the swaps: Twenty-five journalers exchanged Travel Journal pages.
One person would host and send the pages to those participating. Fun to receive photos, sketching, or just words.
I still participate in a carving swap as I mentioned last week:
And I am wondering about what image to carve for Christmas cards this year.
I still enjoy playing with calligraphy and rubber stamps in my journals. What are your favorite art journaling techniques?
©Anne Rita Taylor 2016

Friday, October 7, 2016

Print Vibe

My Owl Carving this week - for the Rubber Amateur Press Society quarterly swap due October - mentioned in an earlier blog:  https://anneritataylor.blogspot.com/2016/07/rubber-amateur-press-society.html
Since it is the Season of the Witch - here is my skeleton carving. I was reminded of another Carving swap - Print Vibe 21 - that I joined for three years: 2010 through 2012. 
Heart and Print Vibe Cover Carvings by Tim Blackburn
Hosted by Tim Blackburn, an excellent carver, Professor of Radiology too. Tim looked for other carvers after 7 swaps; I carved & printed 21 prints - for the last 17 out of 24 issues. 
Another Halloween-theme: my Poe Carving. The print size: a third of an 8 1/2 by 11 inch page = 3 3/8 by 8 1/2 inches. I printed 21 original prints for each issue - 6 issues a year.
Who did not love Michael Jackson!?! I was pleased with my MJ Carving. With my Fish Carving below: I added watercolor.
Please let me know what you think about carving or printing - see my earlier blog: https://anneritataylor.blogspot.com/2016/01/carving-images-for-prints.html
I love multiples! Remember the rubber stamp craze during the 1990’s? That is another story...
©Anne Rita Taylor 2016

Friday, July 8, 2016

Rubber Amateur Press Society

©Anne Rita Taylor 2016
The Rubber Amateur Press Society (RAPS) began in 1992; I joined in 2015. An interesting book was written about the group in 1996 called, Rubber Soul, by Sandra Mizumoto Posey. I bought my autographed copy at a rubber stamp conference in Grapevine, Texas in 1998. Available from Amazon, HERE.


The goal is to enjoy sharing our carvings with other carvers. Each person sends the host up to 20 (depends how many are in the group) original prints of our carving, (pay the postage annually) and receive the same number back in the mail. The commitment is to participate for a year. Go HERE to my Jan. 15 post for carving instructions.


I had joined a similar group called RAPLICA, in 1998, and participated for 6 years. Carving images for prints was considered folk art, and was not an art form with a large following in the 1990’s; it has since become more wide-spread.


RAPLICA was a bi-monthly swap. I lovingly came up with 6 carvings a year. RAPS is now a quarterly swap: 4 carvings year. Pages are 8 1/2 by 11 inches. The carving can be any size. Some people use calligraphy, writing a quote, or write about what they are doing; others simply send carvings.


Tim Blackburn was the host when I joined RAPLICA in 1998. He asked for someone to take over hosting at the end of 2000 and I volunteered. How I managed that while I was working 60 hours a week and trained 6 assistants in 4 years, I'll never know.


Twelve were participating before I started hosting in 2001. Then seven dropped out! Luckily I was active in the Carving Consortium online group, so I invited ten and seven accepted. 


I hosted for four years, then ended one Corporate job and started another. Wendy Gault returned to volunteer hosting RAPLICA in 2005; she had started RAPLICA in 1993 to have more than 20 RAPS carvers involved.


I usually combine calligraphy and carving,  sometimes book arts on my pages. It has been an enriching experience and I’m happy to participate again now that I have more time.  


Friday, April 15, 2016

Folded Paper Pouch

©Anne Rita Taylor 2016

I made these pouches for each person in my writing group. With a list of words we used as prompts for writing an essay. After writing for 15 minutes, we would read to the group what we wrote - fun!
Supplies:
Blender, strainer, sponges, towels
Scissors, bone folder
24 inch ribbon
Rubber stamp for front of Pouch, see my Carving Images for Prints for carving instructions
Journal prompt words: Recognition, Honesty, Routine, Assertive, Productivity, Profound, Silence, Respect, Rebellious, Unique, Legendary, Expansive, Achievement, Harmony, Hope


  • Follow instructions in the Arnold Grummer Paper Making Kit
  • Cut handmade paper into an 8 inch square
  • Fold into triangle using the bone folder; Open and fold into opposite side triangle
  • Turn the paper over
  • Fold in thirds again using the bone folder to measure: 2 & 5/8 inches
  • Open and fold the other way into thirds again - the bone folder makes the creases sharper
  • Open and collapse it together 
  • Fold in middle parts on opposite sides
  • Push it together gently
  • Punch hole in one end
  • Tie knot on the inside 
  • Wrap ribbon around and loop through ribbon to tie another knot outside.

Makes a fun wrapper for a small gift too and a lovely way to use handmade paper!  


Friday, March 4, 2016

Creating White Vine Letters

©Anne Rita Taylor 2016

In the Summer of 2013 I was thrilled to have an article I wrote published in the magazine, "Bound & Lettered" about book-making and calligraphy. In Volume 10, Number 4, sold through John Neal Books, most of what follows appeared in the article.


ortunately White Vine Letters are easier to make than they appear. Basically a Roman Capital overgrown with a vine. While the white vine resembles ivy, it is a stylized version of acanthus leaves which were used as a decorative motif as early as the 3rd century in a Roman mosaic floor. Also used in architecture in the Doge’s Palace in Venice during the Renaissance.


Even though this style of decoration can be seen in manuscripts coming out of monastic scriptoriums as early as the 9th century, it was not until the 15th century that the white vine initial letters were widely used, such as in the Book of Hours, circa 1406. The Roman capital was often in gold.


The upper left corner of the text block would have a white vine initial for the first letter of the first word in the paragraph. The position could change if the section or paragraph started in the middle of the page. 


summer study program on illuminated manuscripts was my introduction to these initials with their intertwining vines. I was able to share my joy for these letters during a mini-workshop I taught for the Houston Calligraphy Guild in 2010.


When making these initials, you can carefully render the vines filling them with multiple flowers and leaves, or you can go for the more informal look in my examples. 


  1. After you draw your one inch high Roman Capital letter in pencil, go over it with waterproof ink, let the ink dry, then erase the pencil lines. I use the Sakura Pigma Micron Pen - Size 01. 
  2. Draw - lightly in pencil - a box around the letter with maybe a quarter inch of space on all sides.
  3. Draw a circular swirl (FIGURE 1) in pencil, more circle than oval for your main vine.
  4. Add shoots coming out of your vine (FIGURE 2)
  5. To give dimension to the vines, double the lines around the vines and shoots (FIGURE 3).
  6. Using your pencil, draw some buds and flowers at the end of the shoots, trying to get the buds and shoots to touch so you can add color (FIGURE 4). 
  7. Go over your pencil ivy and outer box with the Micron 01 Pen. Erase pencil marks as needed. Then using only three colors: red, blue and green; or purple, pink and turquoise; or brown, orange and yellow; color in the spaces, alternating the colors so they are spaced evenly.  Either watercolors or Prismacolor pencils work well depending on the quality of your paper.  
  8. Optional - Color the inside of the Roman Capital letter in gold, either flat gold or metallic gold. Prismacolor pencilmetallic paint, or acrylic metallic ink work well in gold.
After my trip to Paris I colored these white vine letters for bookmarks.

Friday, January 15, 2016

Carving Images for Prints

©Anne Rita Taylor 2016


On Saturday I taught several people how to carve images to make prints. One of my printed postcards "On The Road in Houston" was in a 2013 pack of The Printers Guild and sold at The Printing Museum. I carved the driver and words. Lettering is tricky since it must be carved backwards. 
I have been carving since 1990 and sold my prints at The Printing Museum in Houston. I also authored an article published in RubberStampMadness in 1992, Sept./Oct. - Sculpting The Image. The material I carve comes from Nasco (currently I have no affiliation) - 800-558-9595.


In the past I taught Carving at a few places including The Printing Museum and The Houston Calligraphy Guild. Now I am a part of the Rubber Amateur Press Society. We swap quarterly pages with our new carvings. In a past swap I used a Ukrainian currency - pre-Euro dollars. I carved an angelic figure after increasing the size on my copier. I used Foundational calligraphy to write the Rilke quote.


These are the linoleum cutting tools I use; I buy them at Michaels and Hobby Lobby. The set costs about $20 and has 5 blades.  Mostly I use the #1 lino fine carving tool before I gauge out big pieces of material. I encourage you to try carving - it is lots of fun!